The Ultimate Toolkit: Essential Supplies for a Professional-Grade Lice Check
Performing a professional-quality lice check at home is a challenge if you aren’t equipped with the right tools. Without the proper supplies, it is incredibly easy to miss a small nymph or a well-camouflaged nit. To help you achieve clinical accuracy, we have compiled a guide to the essential gear used by the experts at Lice Charmers.
1. High-Intensity Lighting
Standard overhead room lighting is rarely sufficient for spotting transparent nits or fast-moving bugs. To truly see what is happening at the scalp level, use an LED headlamp or a high-lumen flashlight. A headlamp is particularly effective because it provides direct, hands-free light that follows your line of sight, allowing you to use both hands for combing and sectioning.
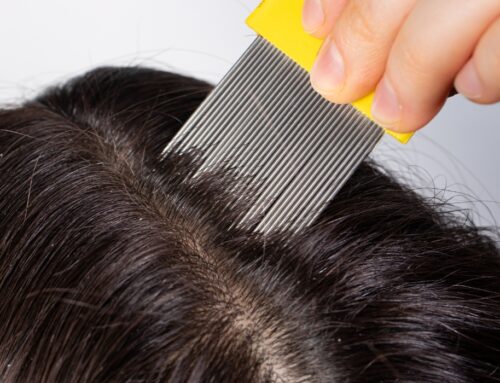
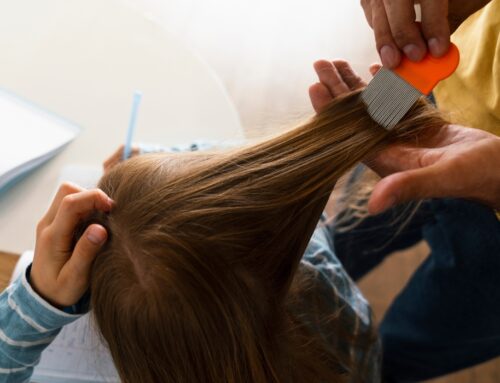
2. Professional-Grade Lice Combs
Not all combs are created equal. For a successful screening, you need a specialized tool with the following features:
- Long Metal Teeth: Look for stainless steel teeth at least 1.5 inches long to reach the scalp through thick hair.
- Tight Spacing: The gap between the teeth must be narrower than a grain of sand to capture tiny nits.
- Soldered Construction: Avoid combs where teeth are set in plastic; these can flex and allow lice to slip through. Professional combs are soldered directly to a metal handle for maximum rigidity and durability.
- Sanitization: Metal combs can be boiled or run through a high-heat dishwasher cycle without warping, ensuring they remain hygienic for years.
Note: Always use a wide-toothed detangling comb first to remove knots before introducing the fine-toothed lice comb.
3. Lubricants and Hair Oils
A “wet check” is significantly more accurate than a dry one. Using coconut oil, hair conditioner, or specialized hair oil serves two purposes: it immobilizes the lice so they cannot scurry away, and it provides the necessary “glide” for the comb to move through the hair without painful pulling. Don’t be shy with the product—saturate the hair from the scalp to the ends for the best results.
4. White Paper Towels
Keep a roll of white paper towels nearby to wipe the comb after every swipe. The white background provides the perfect contrast to see what you have removed. It is much easier to identify a brown louse or a tan nit against a clean, white surface than against a dark countertop or sink.
5. Magnification and Documentation
Lice and nits are incredibly small. If you don’t have perfect 20/20 vision, a magnifying glass is a lifesaver for distinguishing between a nit and common “look-alikes” like dandruff or hair casts.
Pro Tip: If you find something suspicious, take a clear, high-resolution photo. You can often send these images to a lice professional for a quick “ID check,” potentially saving you the time and expense of an unnecessary clinic visit.
By arming yourself with these professional tools, you can catch an infestation in its earliest stages, saving your family time, money, and stress. If you’re still unsure about what you’ve found, remember that the experts at Lice Charmers are always here to provide definitive, stress-free screenings.